Weight (Mass) Calibration Services

NIST Traceable
ISO/IEC 17025 Accredited
Our lab is accredited by the A2LA to ISO/IEC 17025-2017. Your ISO 9000 (series) or other quality program in most cases recognize this accreditation and can accept our calibrations without the burden of conducting site audits or quality surveys.
What does calibration of a laboratory weight entail?

The Best Equipment
ICL uses Mettler & Sartorius mass comparators. Mass comparators compare a weight to a known mass (a NIST calibrated reference weight) and report the difference, to a very small value. The best mass comparators can ascertain and measure differences to 10, 1, and even 0.1 micrograms (one ten-millionth of a gram); multiple weighings, averaged, can resolve the differences to even smaller amounts.
ICL’s mass comparators:
- Mettler UMX-6 (7 decimal places of resolution to 6 grams)
- Mettler AX1005 (5 decimal places to 1011 grams)
- Sartorius CCE-111 (6 decimal places to 100 grams)
- Sartorius CC-10000 (10 kilograms to 4 decimal places)
The Best Reference Weights
The weight under test must be compared to a known weight, so a set of calibrated reference weights, calibrated by an unimpeachable source, is essential.
Environmental Control
The laboratory in which the calibration takes place must be CLEAN and temperature and humidity controlled. Temperature control (stability of the room temperature) is critical; Echelon 1 calibration requirements specify that temperature may not drift more than 0.5 °C per hour. Air is filtered through HEPA filters. Sources of vibration are eliminated. Temperature, relative humidity, and atmospheric pressure must be accurately measured in order to precisely calculate the air density, as the buoyant effect of air on the reference weight and the client’s weight must be calculated and accounted for in the weighing process.
The Right Measuring Equipment:
We measure temperature inside the weighing chamber of each comparator with standards-grade thermistor sensors (accuracy +/-0.02 °C) connected to a Hart Scientific Black Stack readout. The temperature is measured before and after the weighing of each weight and the average is used, along with atmospheric pressure and humidity, to calculate the air density. We use a calibrated GE Druck digital pressure calibrator to read atmospheric pressure to .01 mm of mercury, and a Vaisala digital humidity meter to measure humidity to better than 1%. If you look closely at the photo above, you can see the thermistor sensor inside the weighing chamber of our UMX-6.
The Right Software
Appropriate computer equipment for capture of data, and specially designed software to handle the mathematics involved are virtually a necessity to avoid errors of transcription or in performance of the many sequential calculations required in the process.
Appropriate Procedures Are Critical
ICL follows NIST mass calibration procedure SOP 5, which is a weighing design which uses redundancy., statistical evaluation, statistical cross-checks and check standards in every weighing (SOP-5) to maximize the precision of the measurement. NIST SOP-5 (NIST 3-1 Weighing Design used for ASTM Class 1 weights) requires 12 weighings for each each weight in a client’s weight set.
Skilled Calibration Personnel
Most importantly, skilled calibration personnel are essential to the precision of the calibration. All ICL’s technicians have extensive NIST training. Calibration personnel must wear appropriate static free clothing, as well as gloves, hair nets and face masks, to reduce the possibility of contamination (and changing the weight of the weights) from skin oils, hairs, or airborne droplets. Weights are never touched directly by human hands.
Weight Cleaning
Unless specifically instructed otherwise, we will clean the client’s weights in accordance with accepted NIST procedures prior to calibration. There is no additional charge for this service. Cleaning does add to lead time, as the weights must be permitted to dry and completely equilibrate to the temperature in our mass lab prior to performing the calibration. Entrust your weight calibrations to a properly equipped, competent laboratory.
Calibration Reports
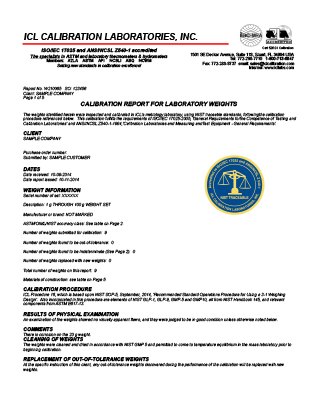
The Calibration Report is the sole tangible end product of the calibration, and the part which your auditor will scrutinize. The report should be clear, easy to understand and use, and contain all the necessary traceability and quality system information the quality department requires and auditor will look for. ICL’s reports were designed to be easy to use and contain all the information required by ISO 17025, ISO 9000 (series), QS 9000, FDA, EPA and other regulatory agencies. Our weight calibration reports are 5 pages long, which are required to furnish all the required information.
We also stock ASTM Class 1 weight sets for immediate delivery.
Recalibration form to send in your weights for calibration.
Mass calibration (metrology) terms explained in plain English.

